In today’s tutorial, we are going to show you a step-by-step guide on how to securely store your TAOs by creating a hardware wallet using a smartphone device.
Requirements for this tutorial
Before we begin the tutorial, please ensure that you have all of these items ready:
- Factory reset smartphone device
- Laptop or PC
- Polkadot Vault
- PolkadotJS or Nova Wallet
Why should I store my Coins in a Hardware Wallet?
Hardware Wallets are offline and your keys are securely generated without being exposed to the internet. That’s the safest way to store your Crypto. You can connect your Hardware Wallet to a Software Wallet without exposing the Keys to stake your Coins but you still need Polkadot Vault to sign the transactions. This adds an extra layer of security, allowing you to participate in staking or other activities while keeping your private keys isolated in the Hardware Wallet.
How to Make a DIY Bittensor Hardware Wallet?
In this tutorial, we are going to show you how you can create a safe Hardware Wallet for your TAO. This works also for other digital Assets but we are here focused on TAO.
Step 1: Reset your smartphone
To create your own Ledger-like Hardware Wallet, start by performing a factory reset on your old smartphone device. This will erase all data and settings, giving you a clean and secure foundation for storing your TAO.
Step 2: Download the Polkadot Vault App
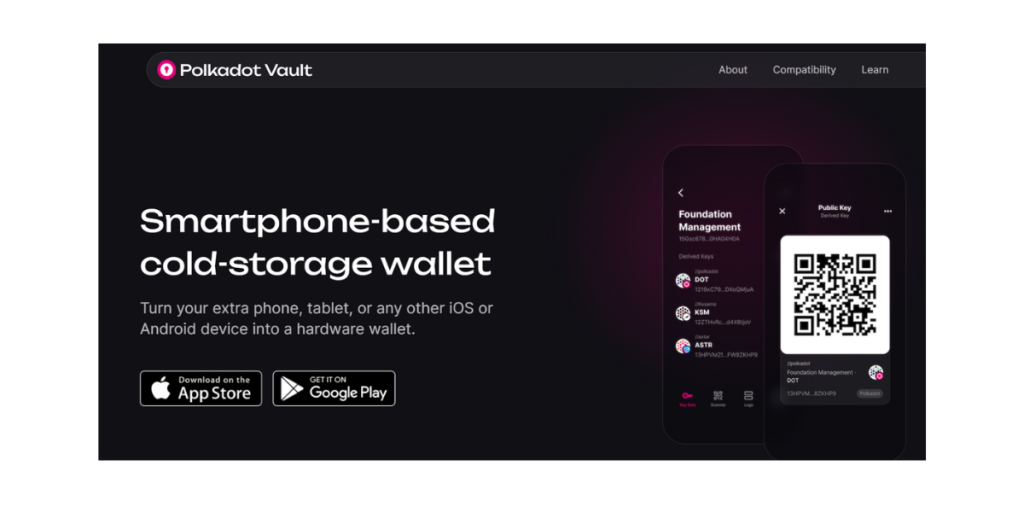
Download the Polkadot Vault App to your device. This app is where you will securely create your public and private keys. Don’t run other apps on that phone as it now functions as your offline wallet now.
- Download Link for Apple users
- Download Link for Android users
Step 3: Wifi & Bluetooth off and Phone on Airplane Mode
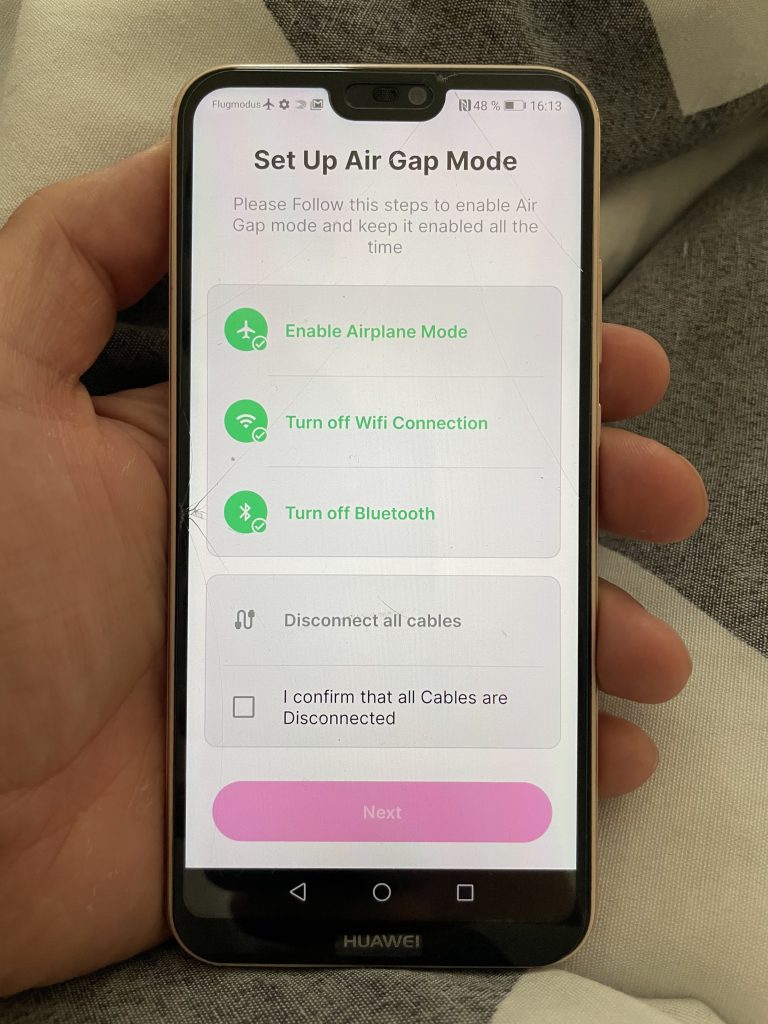
In this step, make sure to turn off both Wi-Fi and Bluetooth connections, and enable Airplane mode to avoid exposing your seed phrase to the internet. This precaution is essential to ensure the utmost security for your assets.
Step 4: Open the Application and generate your keys
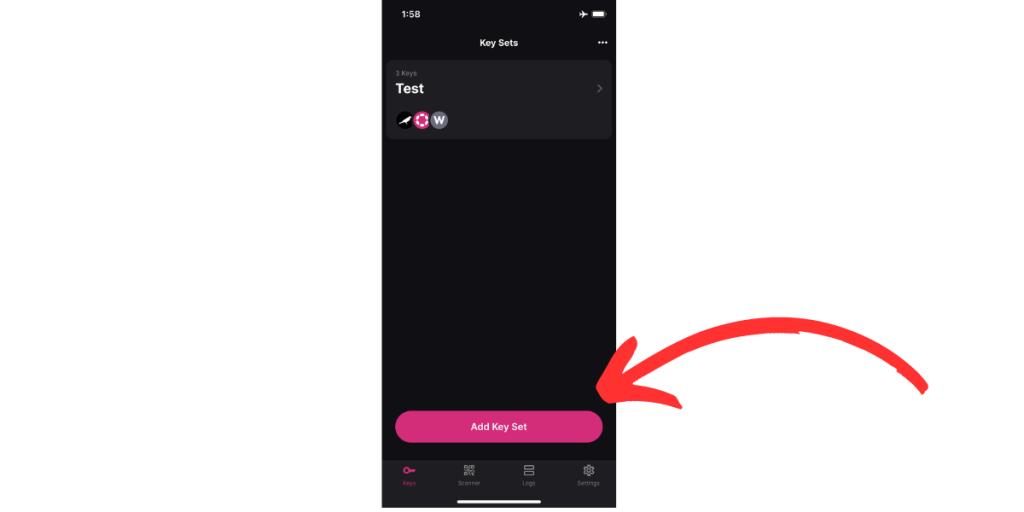
Open the Application and generate your keys by clicking on “add new key set.”
Step 5: Write the 24 words down on a piece of paper
These 24 words serve as your private key to access the wallet. Store them securely and never expose them to the internet. In case your smartphone becomes inaccessible, you can always use these words to recover your funds and regain access to your wallet.
Step 6: Add the subtensor network to your wallet
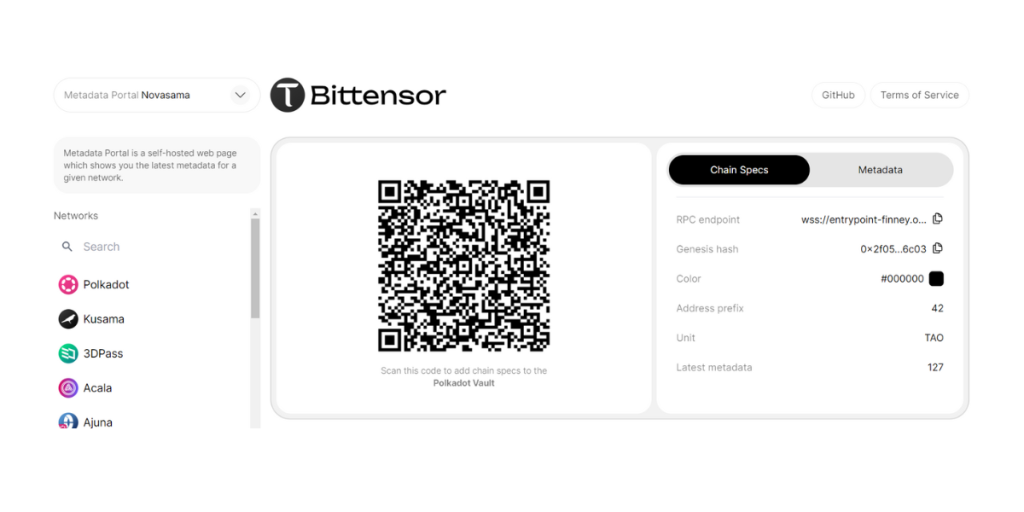
Open your desktop browser and navigate to the following URL: https://metadata.novasama.io/#/node-subtensor. Once you’re on the website, ensure that you’re in the “Chain Specs” section.
Now, take out your smartphone and launch the Vault App. Within the app, you’ll find a scanner feature. Use this scanner to scan the QR-Code displayed on the website. By completing this step, you have successfully added the subtensor network to your wallet.
Step 7: Update the Metadata
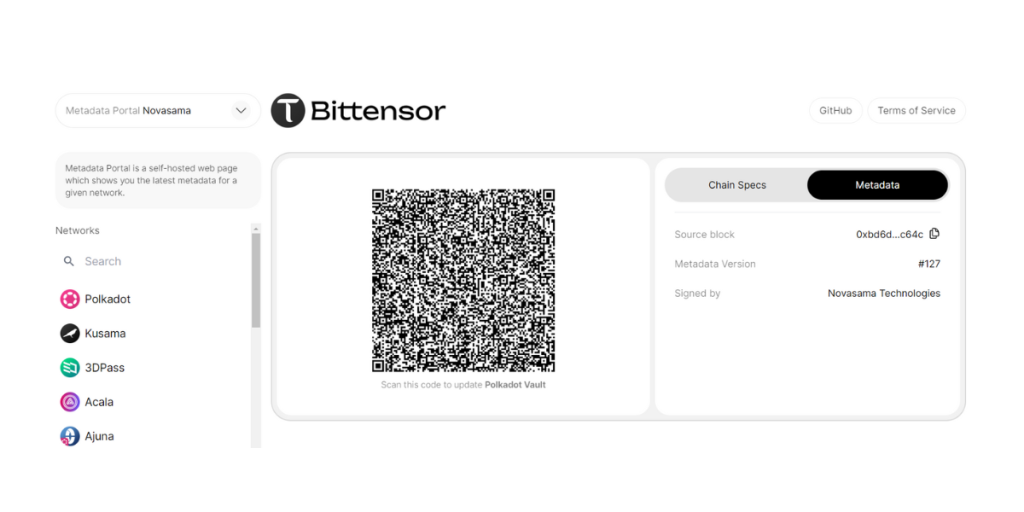
To update the metadata, visit https://metadata.novasama.io/#/node-subtensor, click “Metadata,” and scan the QR-Code. Download and securely sign the metadata, currently node-subtensor127 (07.31.23).
Step 8: Create a Bittensor account in your Polkadot Vault
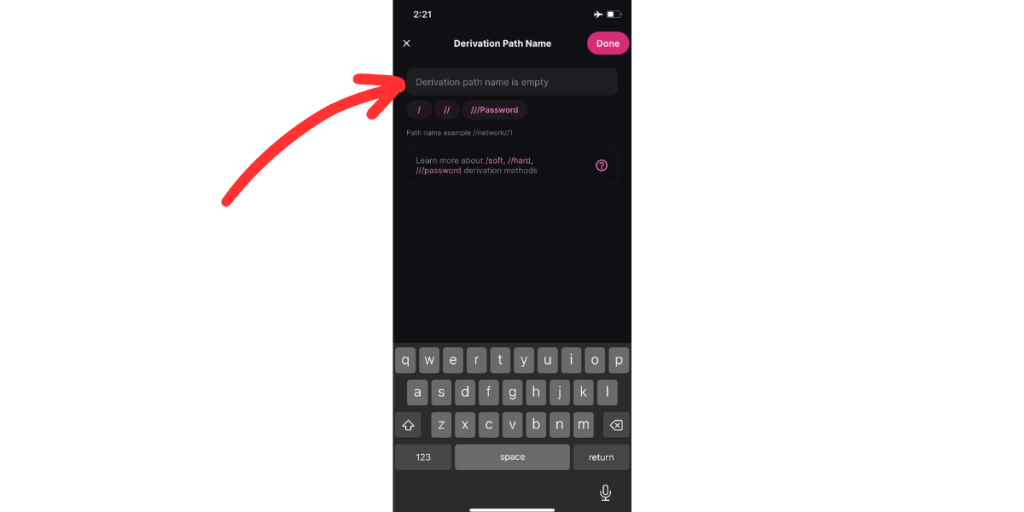
Create a Bittensor account in your Polkadot Vault. Click the (+) sign at the top right and choose “Node-subtensor”. Click on “derivation path” and choose a name and password like this: //name//password
Press “Done,” create the derived key, and confirm with your PIN. Don’t forget to write this information down on paper as a backup. Now your Bittensor Account is established in the Polkadot Vault.
Step 9: Connect Vault with Polkadot js
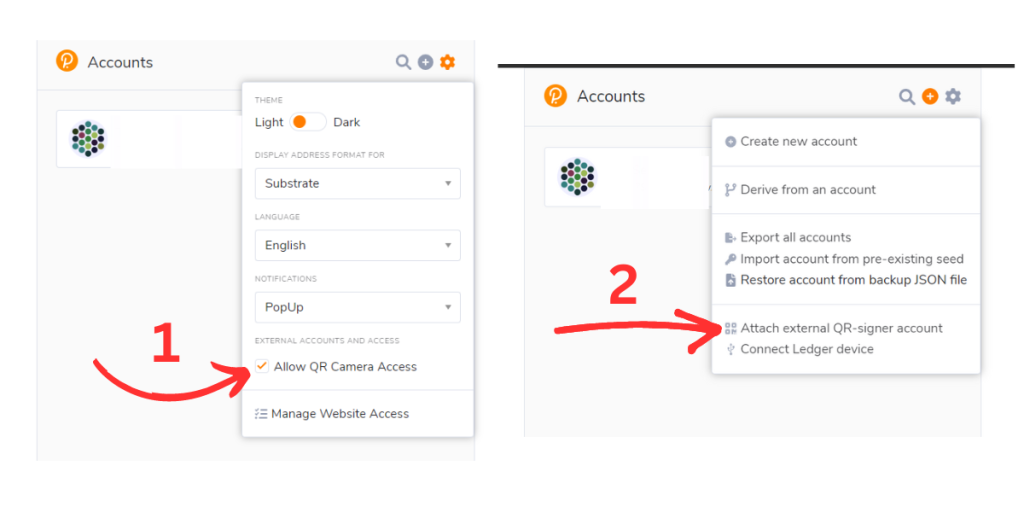
To transact or stake your TAO you should connect your newly created keys with a Software Wallet. Install PolkadotJS Extension on your Browser and go to settings and allow your Polkadot Extension the Camera Access by clicking “Allow QR Camera Access”. After that click the (+) icon in the wallet. Generate a QR-Code in the Vault App and export your TAO wallet securely by holding the QR-Code to your Webcam.
This ensures your private key remains safe from internet exposure. Now, you can use the extension to effortlessly stake or send crypto and confidently confirm transactions using your Vault.
Info: Nova Wallet is mobile only and has no Browser Extension.
How can I sign a Transaction with Polkadot Vault?
If you want to transact with your Software Wallet like Nova a QR-Code will pop up, you scan that with your Polkadot Vault and need to enter your phone’s PIN. Now you should see the details of that transaction. Show the signed transaction to your computer again by clicking the signed signature via the camera button and scan the new QR-Code, that’s it.
How can I check my balance with my Hardware Wallet?
Your Balance will be shown in your Software Wallet as Polkadot Vault is not a Wallet. It’s used to securely create your keys and sign transactions.
How do I know the Hardware Wallet is safe?
Polkadot Vault is considered safe due to its air-gapped nature and the way it operates as a cold storage solution. As an air-gapped wallet, it functions in airplane mode, ensuring the device remains disconnected from the internet while creating, managing, and restoring accounts. This isolation significantly reduces the risk of unauthorized access and protects your private keys from online threats.
Furthermore, it securely signs transactions using QR codes without revealing your private keys. This minimizes the risk of key theft and ensures that your sensitive information remains protected.
Following our best practices ensures users can confidently manage their digital assets with peace of mind.
Can I stake my TAO with my Hardware Wallet?
Yes, you can stake your TAO tokens effortlessly using your newly created Hardware Wallet. To get started, log in to your Software Wallet with the Polkadot Vault. Once logged in, you can use your wallet as you normally would. If you need further guidance, we’ve already prepared a simple staking tutorial, which you can find here. Follow the steps outlined in the tutorial to start staking your TAO and make the most of your Hardware Wallet’s capabilities.
Special Thanks to Silas, a trusted community member, who has written this tutorial and personally tested all the steps in this tutorial.